THE LAB #12: Reverse-engineering Mobile API
Excerpt
Scrape data from apps using Charles Proxy and Android Emulator, a step-to-step guide to reverse app API
This post is sponsored by Smartproxy, the premium proxy and web scraping infrastructure focused on the best price, ease of use, and performance.
[

Smartproxy
In this case, for all The Web Scraping Club Readers, using the discount code WEBSCRAPINGCLUB10 you can save 10% OFF for every purchase.
This article is written by Fabien Vauchelles, the Anti-Ban Expert at Wiremind - a leading revenue management solutions provider for the transportation, supply chain, and event sectors. With over a decade of experience in web scraping, Fabien’s passion for code and technology is unmatched. He is the mastermind behind Scrapoxy - a cloud-based proxy rotation tool - and is now working on the highly anticipated version 4.
When we try to scrape a site and struggle to retrieve the data, we often forget that there is also a mobile app. According to Brazilian researcher Tiago Bianchi, about 59% of internet traffic is mobile. So, why not take advantage of this? And most of the time, mobile app APIs are less protected than websites.
[

% of mobile traffic worldwide from 2015 to 2022 (source: Tiago Bianchi)
In this article, we will focus on android app analysis. We will use the Android Studio IDE, which includes an emulator. We will connect Charles proxy, a software specialized in HTTP and HTTPS protocol analysis. It is extremely useful for designing or analyzing web and especially mobile applications. It even offers a root certificate to bypass SSL Pinning. Charles is an alternative to Fiddler, which Pierluigi presented in the first lab article.
[

Charles Proxy
Our environment is Ubuntu 22.04.
Part A: Setup of Charles
Note: We will use the Charles free trial, limited in usage time, which is more than enough for our needs.
Step 1 : Get Charles Proxy
Add the package from sources:
<code>$ wget -q -O - https://www.charlesproxy.com/packages/apt/PublicKey | sudo apt-key add -
$ sudo sh -c 'echo deb https://www.charlesproxy.com/packages/apt/ charles-proxy main > /etc/apt/sources.list.d/charles.list'
$ sudo apt-get update
$ sudo apt-get install charles-proxy </code>
Step 2: Enable SSL Proxying
Start Charles and open the menu Proxy > SSL Proxying Settings:
[

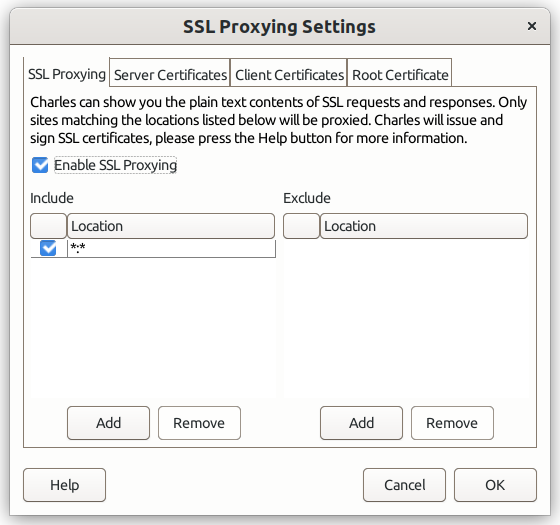
SSL proxy settings
Click on Enable SSL Proxying and add a location *:*
Step 3: Download Charles certificate
Open the menu Help > SSL Proxying > Save Charles Root Certificate…, and save the certificate on your disk.
Step 4: Rename the certificate
The certificate cannot be used as is as a system certificate. We need to rename the file to match the format
Let’s compute the hash:
<code>$ openssl x509 -inform PEM -subject_hash_old -in charles-ssl-proxying-certificate.pem | head -1</code>
Our hash is 4fe145fd. We need to rename the file :
<code>$ mv charles-ssl-proxying-certificate.pem 4fe145fd.0</code>
Let’s keep this certificate handy, we’ll use it again later.
Step 5 : Find your local IP
Open the menu Help > Local IP address:
[

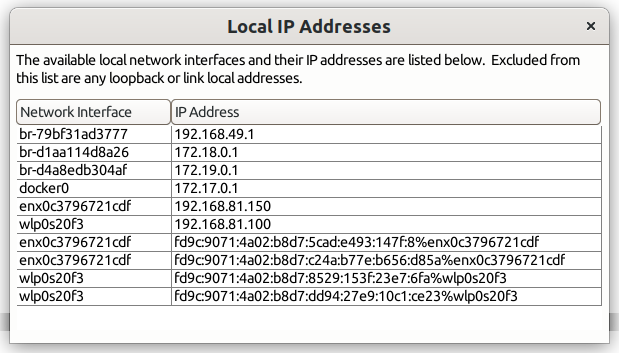
Local IP address
And remember your IP address !
For me, I always use my internal docker address because it never changes (here: 172.17.0.1)
Part B: Setup of an Android image
We will install Android Studio and create an image.
At the end of this section, we will run a non-rooted Android Tiramisu (API 33). It is possible to root the image (even though it is not necessary) with Magisk.
Step 1: Install Android Studio
Android Studio can be found here and they provide an installation manual for Linux.
From Ubuntu, you can use snap:
$ sudo snap install android-studio --classic
Step 2 : Create an empty Project
Open Android Studio and create an empty project:
[

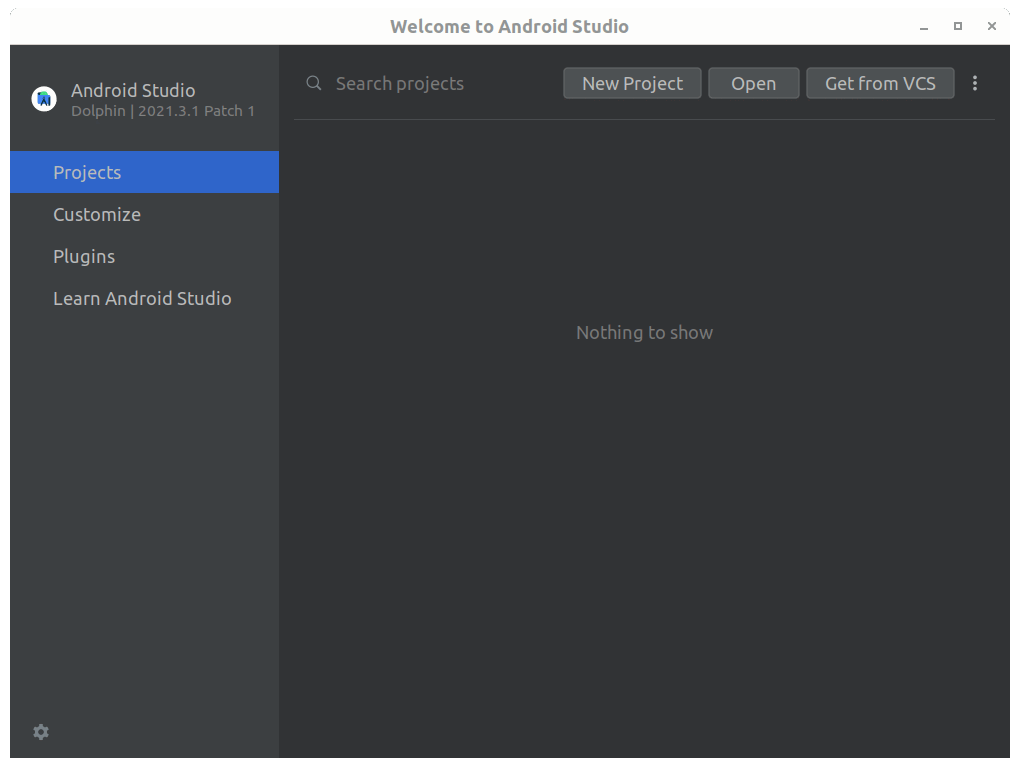
Android studio
For the minimum SDK, choose the latest (here, we are using API 33: Android Tiramisu).
Step 3 : Create a new device
Open the device manager and click on Create device in the Virtual tab.
The Pixel 6 Pro is a good choice because it is not including a Play Store. Other images with a store have a read-only file system because they are in production mode. You can skip them because we need to install a system certificate later (don’t worry, there is a method below to run an alternative store!)
For the system image, choose the latest release (here, we select Tiramisu) and click on the Download icon (if required).
[

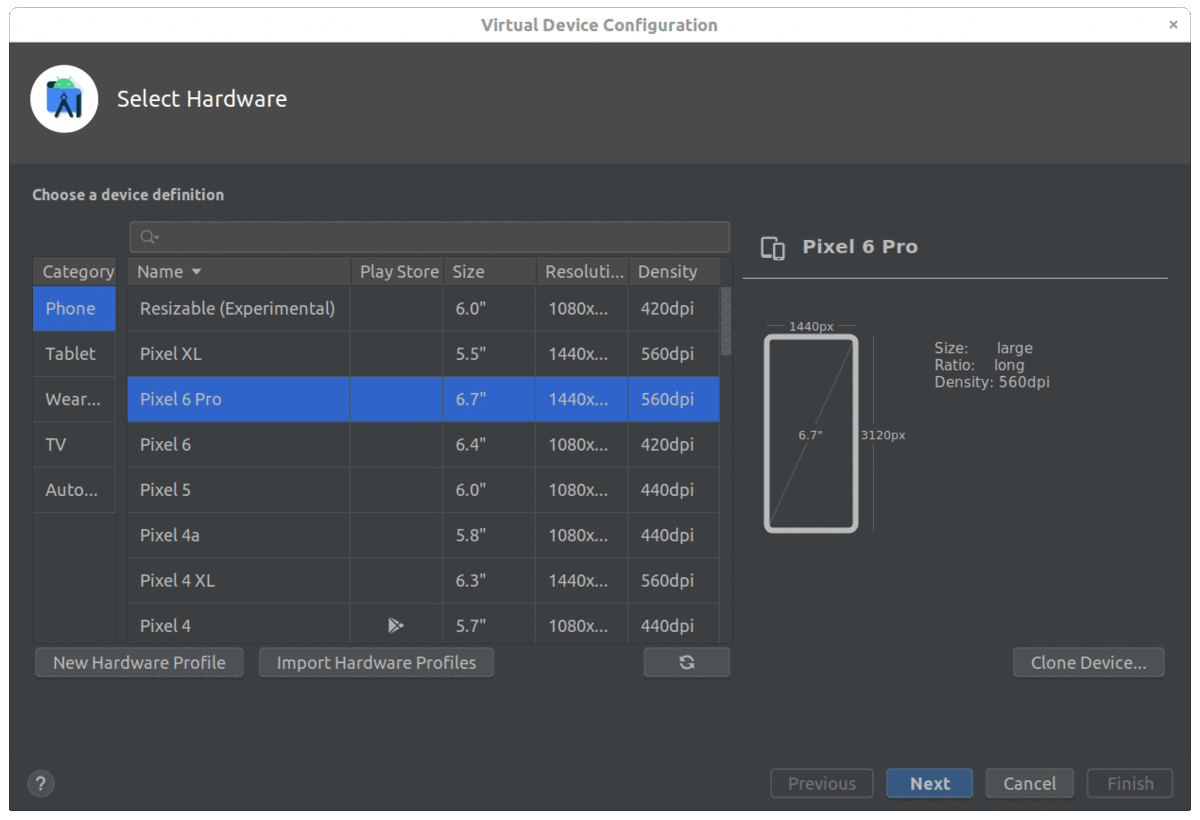
Create a device on Android studio
Step 4 : Start the emulator
We start the image from the command line (Android Studio won’t be used anymore). Open the terminal and list the available images:
$ cd ~/Android/Sdk/emulator/
$ emulator -list-avds
Pixel_6_Pro_API_33
And start the image with the —writable-system option. Otherwise, you won’t have the certificate installed:
$ emulator @Pixel_6_Pro_API_33 -writable-system
Step 5 : Install the system certificate
To avoid SSL pinning issues, we will install the certificate as a system certificate and not as a user certificate. Make adb root:
$ adb root
$ adb remount
If adb asks to reboot, restart the device (otherwise, skip this part):
$ adb reboot => wait for device restart!
$ adb root
$ adb remount
Copy the certificate from the previous part, into the system certificates directory and restart the device again:
$ adb push 4fe145fd.0 /system/etc/security/cacerts/
$ adb reboot
Step 6 : Check that certificate is correctly installed
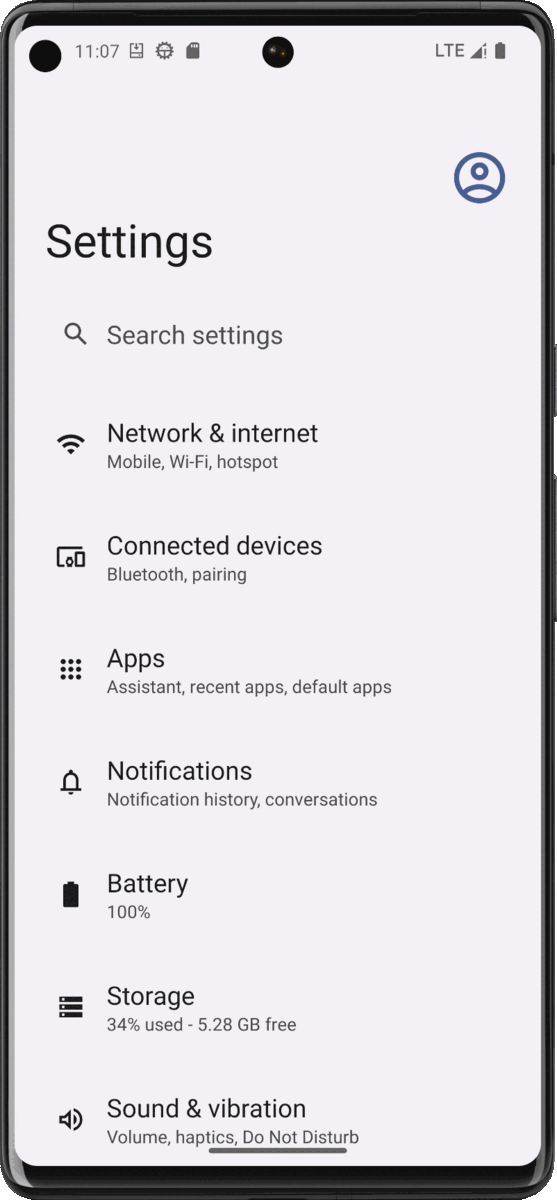
Go to Settings > Security > More security settings > Encryption & credentials > Trusted credentials, click on the System tab and scroll to the end. You will find a certificate named X_K72 Ltd_ from Charles Proxy CA:
[

Checking the certificate
Step 7 : Redirect all traffic to Charles Proxy
Click on the … button on the emulator’s menu and select proxy configuration in Settings > Proxy :
[

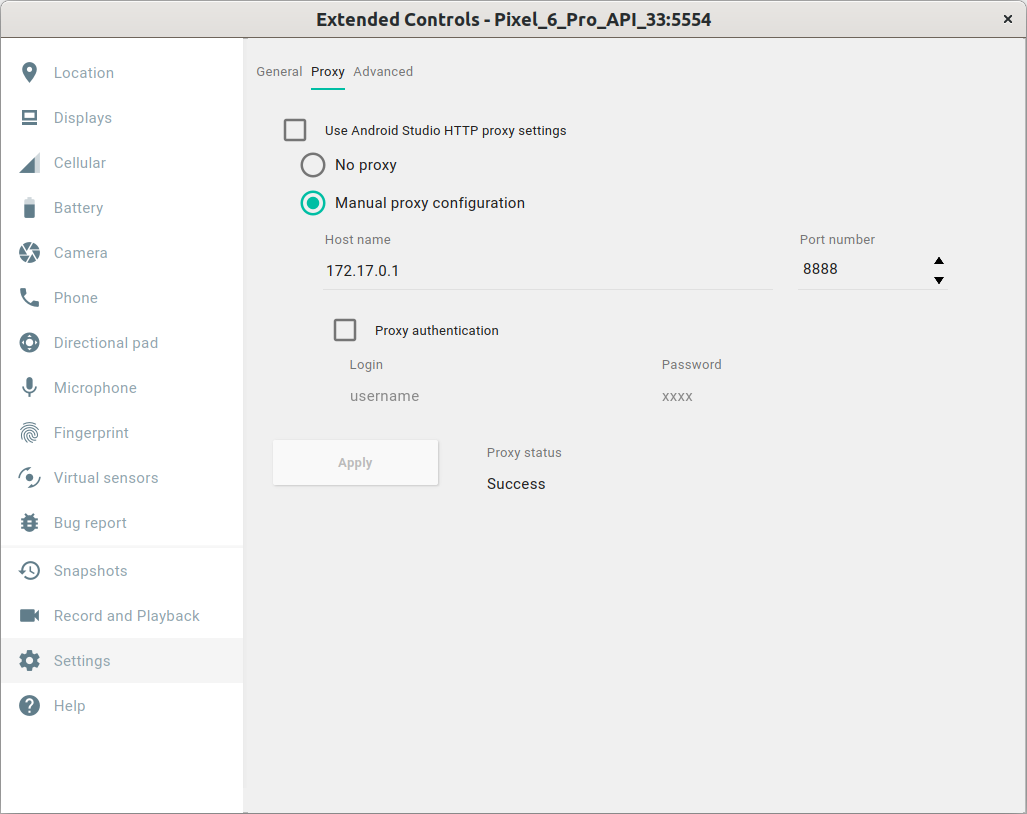
Extended controls
Use the IP address that you remember previously. By default, Charles runs on port 8888.
You can open an app on your emulator (e.g: Youtube) and check that all traffic is coming through Charles Proxy.
Part C: Installation of the targeted app
In this article, we will analyze the Frisquet Connect app. Frisquet is a heater manufacturer and they have developed an application to control their gas boilers. A few weeks ago, I wanted my Google Home to automatically control the temperature of the boiler. So I looked for a Frisquet API. But nothing exists! No open API! This technique helped me to understand how the app communicates with the API.
In this article, we will study 2 methods for installing Android applications on the emulator.
Method A: Install application from a store
In an ideal world, we would install applications from the Google Play Store! However, as previously mentioned, we installed an android image without any store… and images with a Play Store are read-only, making it impossible to install a system certificate.
We will install an alternative store called AuroraOSS.
Step 1: Download the APK
Get latest AuroraOSS APK from the website.
Step 2: Install the store
Use adb to push and install the package:
$ adb install -r ./AuroraStore_4.1.1.apk
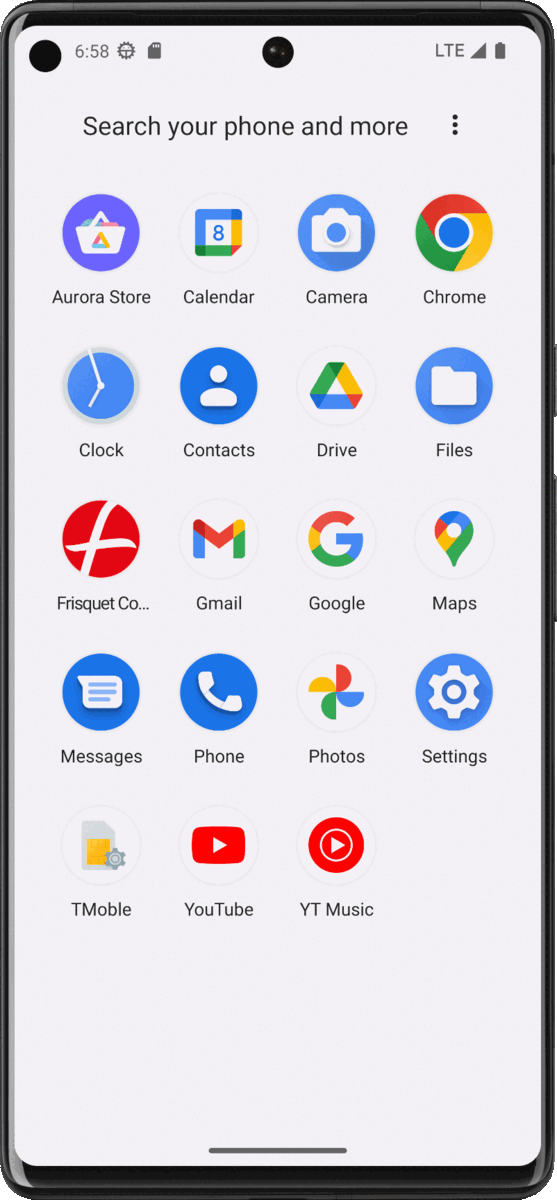
On the applications list, start the Aurora Store. During the setup, choose Session installer, grant all needed permissions and select the Anonymous login:
[

Aurora OSS store
If I log in the app :
[

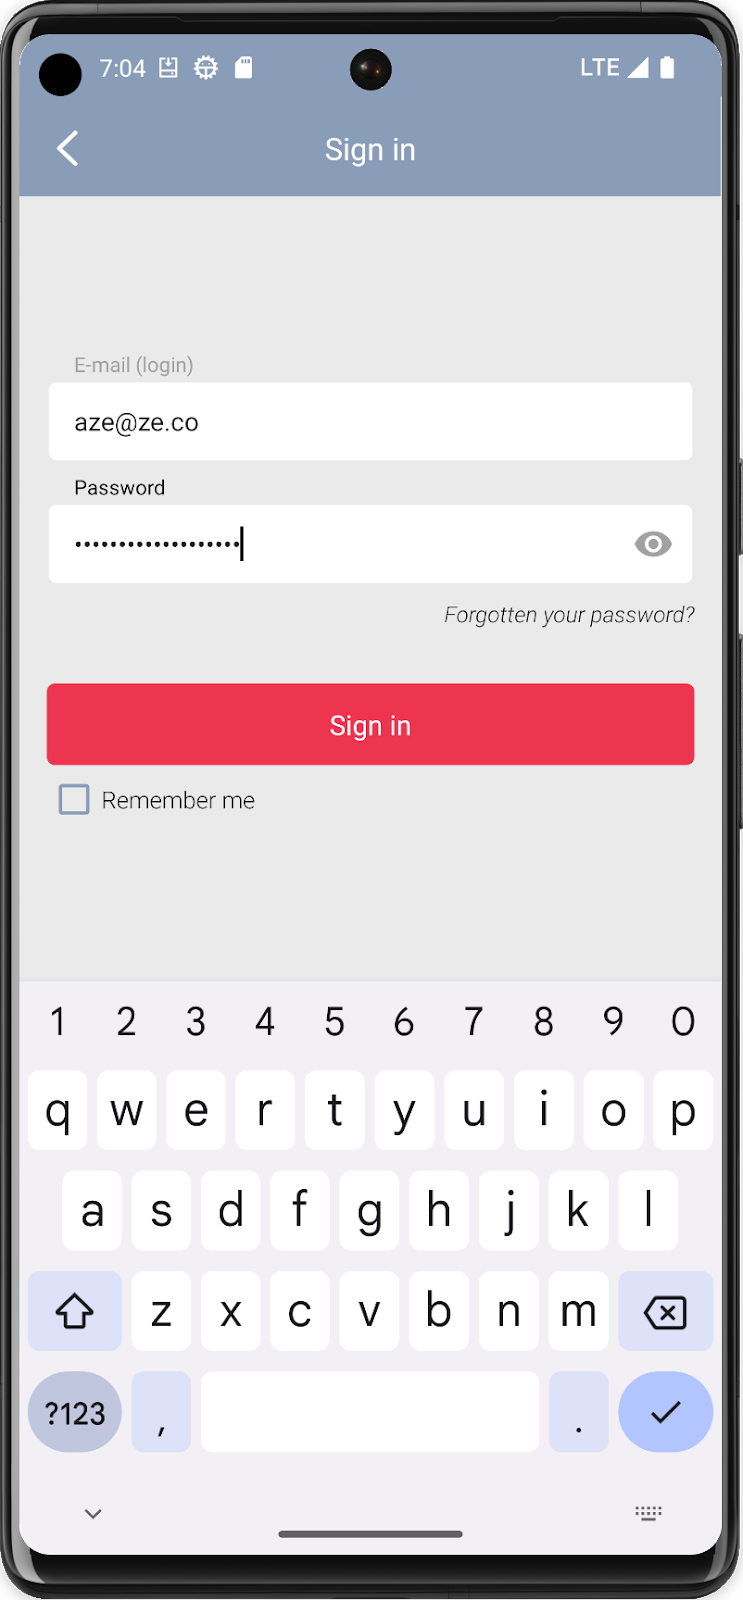
Login
I will see the login request in Charles :
[

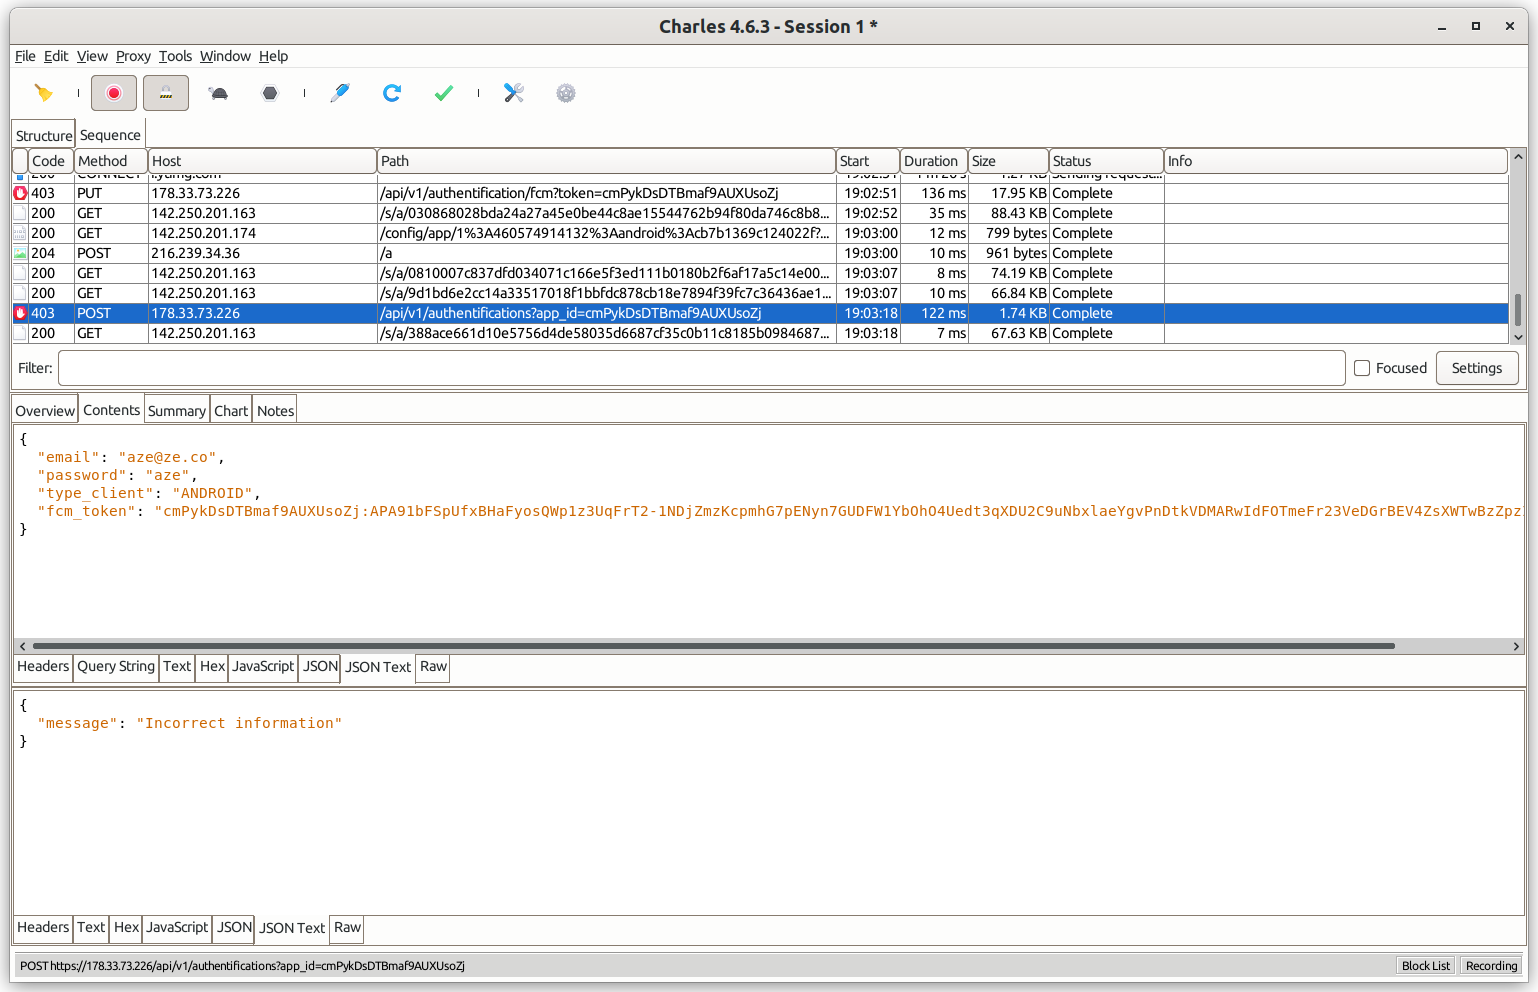
Login requests in Charles proxy
Method B: Install manually the APK
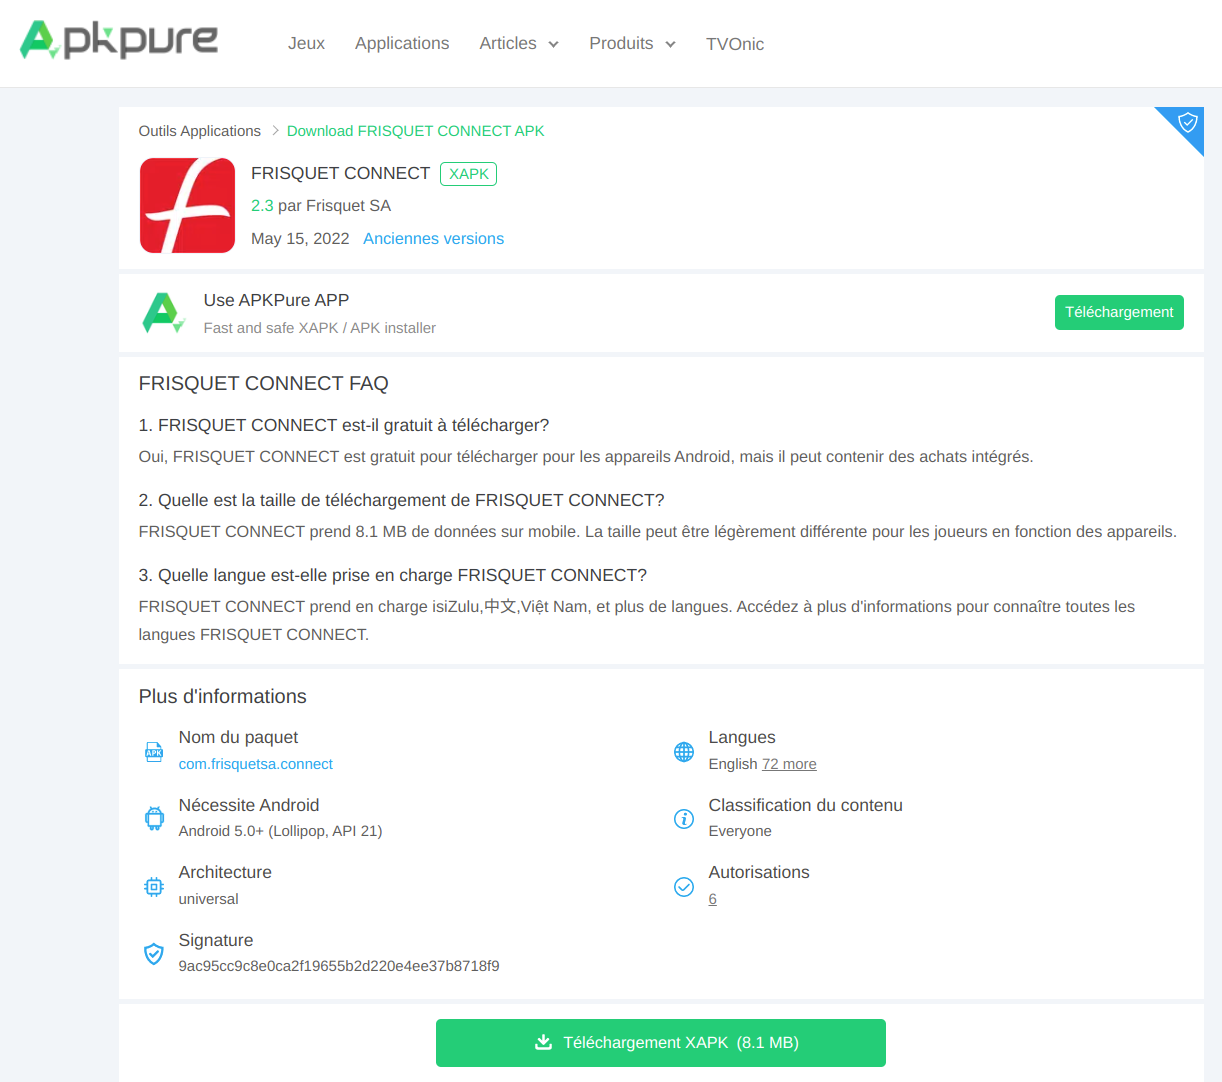
The site Apkpure allows you to download Android app APKs.
⚠️ Warning ⚠️
I highly recommend you to avoid sites like Aptoide. They provide modified packages with keyloggers, etc. (check with JD-Gui decompiler if you don’t believe me). Use them at your own risk, especially if you plan to use your personal credentials…
Step 1: Download APK
Go to apkpure.com and find the targeted app in APK format.
[

Apkpure
For this app, the site provides the XAPK version. This is an overlay on top of the APK format (Android application) which contains additional assets that we won’t use.
Note: Most of the apps on APKPure are APK files, without XAPK overlay. I took this example on purpose to share this specific format.
Since this file is a zip, we can rename the file:
$ mv "FRISQUET CONNECT_2.3_Apkpure.xapk" "FRISQUET CONNECT_2.3_Apkpure.zip"
And we unzip the archive:
$ unzip FRISQUET\ CONNECT_2.3_Apkpure.zip
Archive:  FRISQUET CONNECT_2.3_Apkpure.zip
 extracting: com.frisquetsa.connect.apk
 extracting: icon.png
 extracting: config.xxhdpi.apk
 extracting: manifest.json
We find the APK file inside.
Step 2: Install the APK
There are 2 solutions to install an APK package:
a/ either you drag-n-drop the app from the host to the emulator
b/ or you install it from a terminal with the following command line:
$adb install -r ./com.frisquetsa.connect.apk
Note: -r replaces the existing app
Now, you will find the app in the phone menu.
Tip: Remove SSL Pinning by modifying the APK code
This method removes the SSL pinning from the package code.
It may not work every time but it is a method worth mentioning.
We use the apk-mitm tool.
You can type:
$ npx apk-mitm com.frisquetsa.connect.apk
The tool will decode the apk, modify the Network Security Configuration, modify the source code, and re-encode the apk.
Part 4: Analyzing apps with Charles
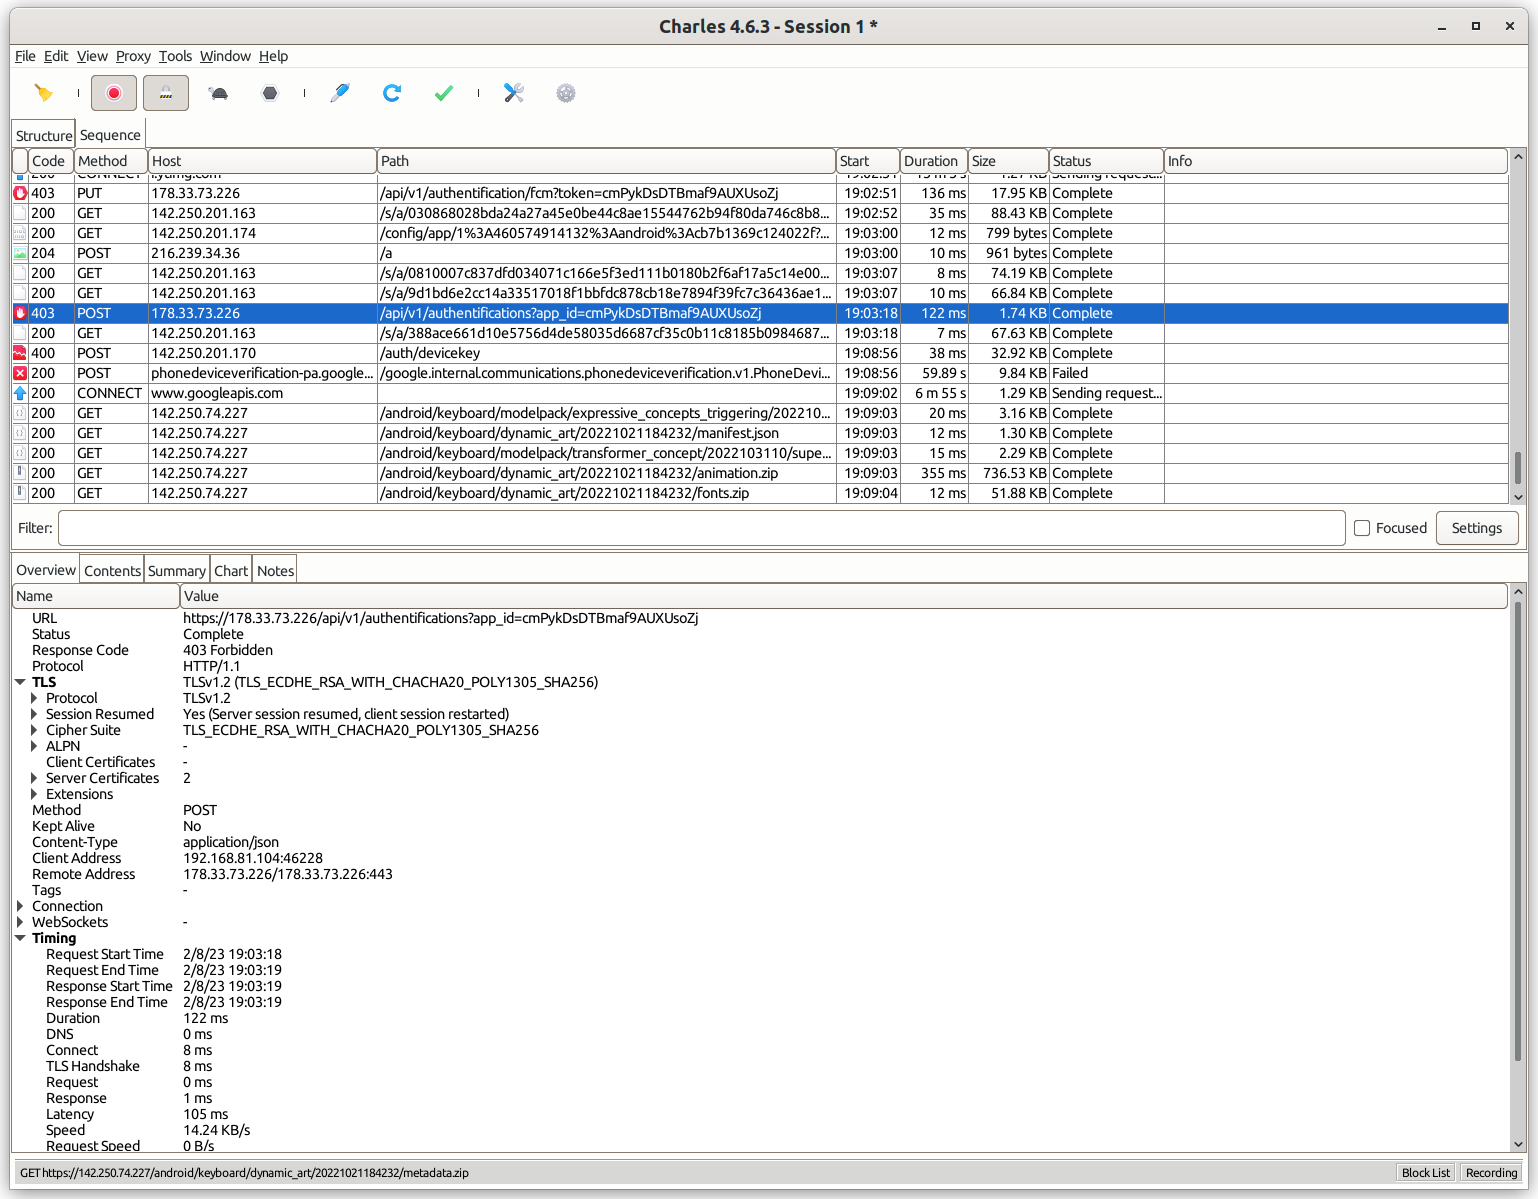
Charles Proxy is very easy to use.
In the upper part of the application, you can find the list of intercepted HTTP requests. The lower part details the request.
In the “Contents” tab, you can find all the information about the request and response, including headers, query string, payload, etc. In the “Overview” tab, you can also find TLS information such as version, Cipher Suite, etc:
[

TLS on Charles Proxy
Bonus: Decompiling the application code to find secrets or understand methods.
If you want to read the source code, you can use tools such as JADX or JD-GUI.
Here is the Frisquet Connect app opened with JADX:
[

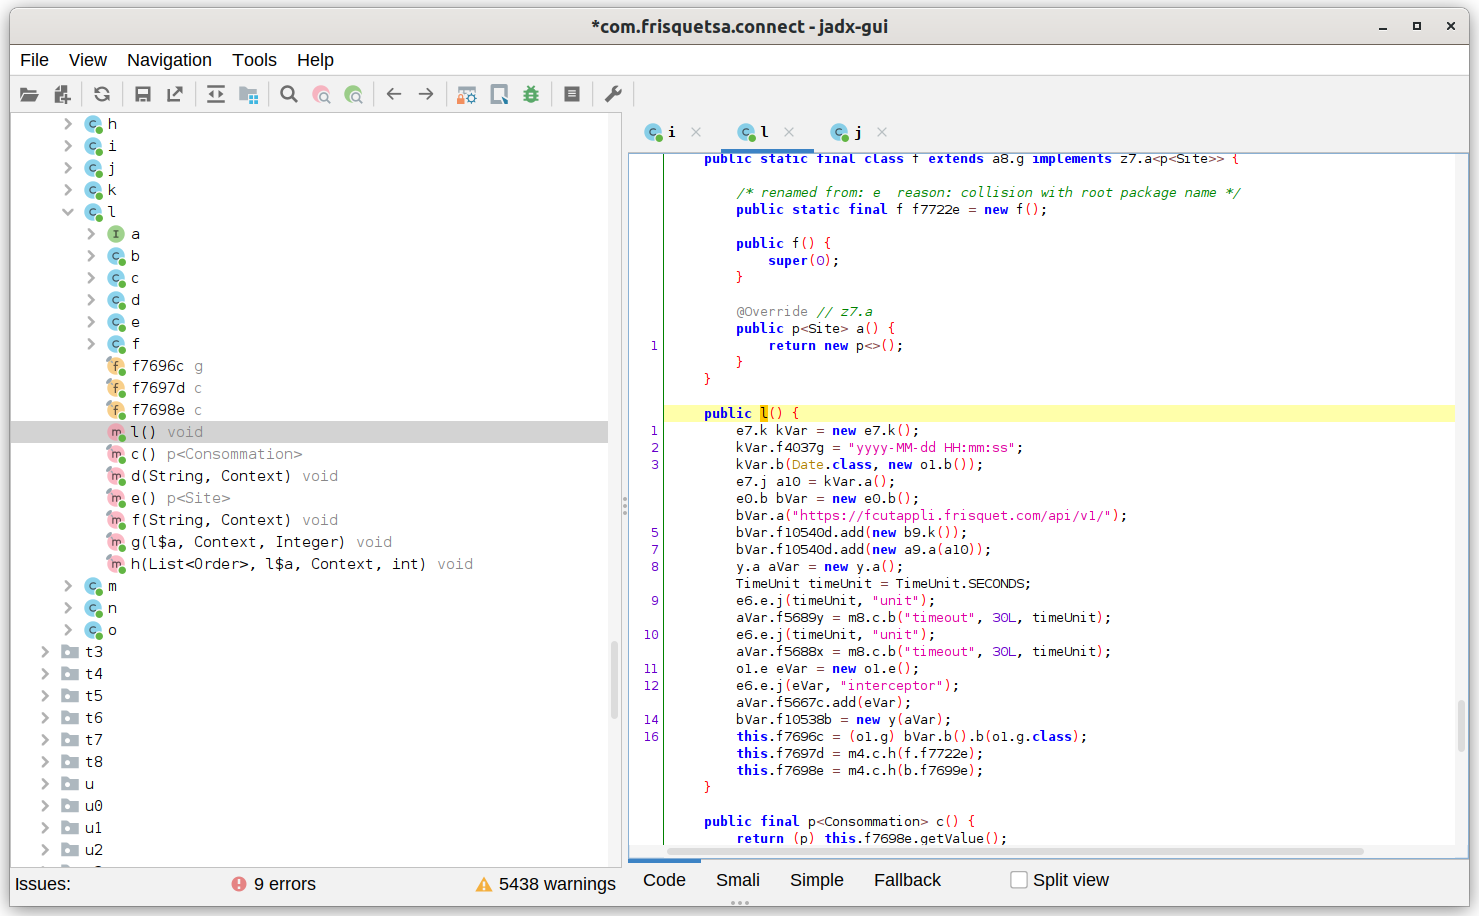
Frisquet
You can find the app ID, hash generator, etc.
This method allows you always to have an emulator available to analyze an Android app.
Simply restart the VM and install the new app (don’t forget to launch the emulator with the -writable-system option).
There are also other techniques, including the Frida tool that allows you to inject code into a compiled app. But that will be the subject of another article on this blog 🙂